After an object has been added to a level, it may be manipulated by changing its properties. All types of objects have properties such as Name and Location, but each type of object has its own unique properties as well.
All object manipulation operations require that Normal Mode be active (Command-Y) and that the Properties floating window be visible (Command-1.) The Arrow Tool should be selected.
Selecting Objects
Before an object's properties can be adjusted, the object must be selected. To selected an object, simply click on it.
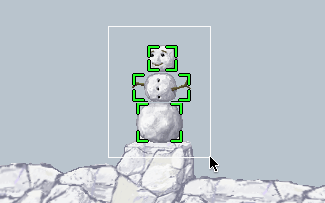
At times it may be useful to have more than one object selected. The quickest way to select multiple objects is to drag the mouse to draw a rectangle around a cluster of objects, as shown below.
Additionally, each object may be individually selected or deselected by clicking on it while holding either the Shift or Command key.
Moving Objects
A selected object may be moved by dragging it to a different location. Its position can be fine-tuned by using the arrow keys to move it one pixel at a time. If the Shift key is held down when an arrow key is pressed, the object will be moved eight pixels at a time. Selections of multiple objects may be moved by clicking down on one of the objects and dragging, or by using the arrow keys.
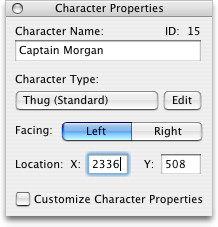
If a single object is selected, its location may be changed by adjusting its X and Y values in the Properties floating window as shown below, where a character's X location is being changed.
Recently moved objects may be moved back to their previous location by selecting Undo Move from the Edit Menu (Command-Z).
Since most types of objects collide with solid material, objects should not be moved into areas designated as solid. More information about working with objects and Solid Material Masks can be found in the Solid Material Mask Editing section. General information on solid material masks is available in the Elements of a Game section.
Renaming Objects
Naming an object can make it easier to keep track of it. When an object is selected, its name appears in the field at the top of the Properties floating window. To change an object's name, click in the field and enter a new name. Every object may be renamed except for the Camera.
Resizing Objects
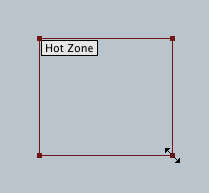
Three types of objects are able to be resized: lighting effects, force fields, and hot zones. These objects are invisible in the actual game, but in the Levels Window they are represented as labeled rectangles with corner handles. To resize an object, move the cursor to one of the object's four corners. The cursor will display the resize icon when it is positioned over one of the corner handles, as shown below. Drag the corner handle into the desired position.
Duplicating Objects
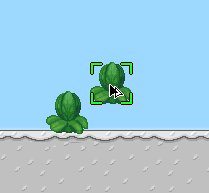
To duplicate one or more selected objects, position the cursor over one of the selected objects and hold down the Option key while dragging the mouse. When the Option key is down, the cursor will change as shown below. Alternatively, use the Copy (Command-C) and Paste (Command-V) commands in the Edit menu. Any type object may be duplicated except for the Camera.
Deleting Objects
To delete one or more selected objects, press the Delete key, or select Clear from the Edit Menu. To add a selection to the clipboard as it is deleted, select Cut from the Edit Menu (Command-X.)
Another way to delete objects is to use the Delete Tool, which as highlighted below.
Using the Delete Tool, click or drag over unwanted objects. Any objects under the cursor will be removed.
Any object may be deleted except for the Camera and the last remaining Player Start Location. Recently deleted objects may be restored by selecting Undo Clear from the Edit Menu (Command-Z.)
Finding Objects
An object can be located within a level using the Find Window. To display the Find Window, select Find Object... from the Edit menu (Command-F.)
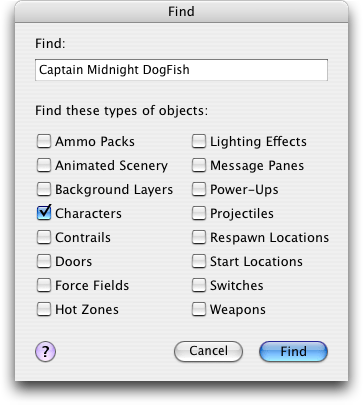
Enter all or part of the name of an object that needs to be found in the Find field, and check one or more of the object type checkboxes to specify which types of objects to search for. After clicking the Find button, the first object that matches the search criteria will be displayed and selected in the Levels Window. If no object matches the search criteria, a message box will appear, reporting that the search was unsuccessful.
Editing Object-Specific Properties
When an object is selected, the Properties floating window displays the controls needed to edit properties specific to that object. For example, when a Player Start Location is selected, the Properties floating window displays a set of controls for making the Player face either to the left or right. Explanations of the properties unique to each type of object are provided in the links below.